Organizing a conference takes planning, time, and care to make it successful. One small but powerful detail that many overlook is the conference kit. It sets the tone, helps guests feel ready, and makes your event look professional. If you are a conference organizer, you might be thinking about how to prepare a conference kit for attendees.
To prepare a good conference kit, start at least one month before the event. Choose a strong, light bag or folder to hold all items. Include a welcome letter, event schedule, name badge, pen, notebook, and local area guide. Add sponsor materials and one thank-you gift. Keep everything neat and well-packed.
Want to know what items are most useful or often missed in kits? Or curious about when to pack or hand out the kits? If yes, keep reading because this article covers everything you need to create the perfect conference kit from start to finish.
How to Prepare a Conference Kit for Attendees?
A good conference kit helps make a great first impression. It gives attendees what they need to enjoy the event. It also makes them feel welcome and part of the community. Here is how you can prepare a useful and well-planned conference kit for your event.

Plan the Kit Early
Start preparing the kit at least a month before the event. This gives enough time to design, print, and pack items. Make a checklist of what to include and confirm quantities. Early planning avoids last-minute rush and ensures nothing important is missed.
Pick a Good Bag or Folder
Choose a durable bag or folder to hold all materials. It should be light, easy to carry, and have your event logo. The design does not need to be fancy, just neat and clear. A good-quality bag makes a lasting impression and helps attendees stay organized.
Include a Welcome Letter
Add a short welcome letter to greet the attendee. It should thank them for joining and explain key event details. Include contact info for help and important times like opening and lunch breaks. A friendly note makes guests feel valued and informed.
Add the Event Schedule
Print a clear event schedule and add it to the kit. Include session times, speaker names, and room numbers. Use large, readable fonts and simple layouts. A printed schedule helps attendees follow along easily without needing to check their phones often.
Provide Name Badges and Lanyards
Each attendee should get a name badge and a lanyard. This helps with networking and makes it easy for staff to recognize them. Print names clearly in bold letters. Lanyards with your event logo also serve as a simple souvenir after the event.
Include Writing Supplies
Add a pen and a small notebook to the kit. Many attendees like taking notes during talks or workshops. You can print your event name or website on the notebook. It’s a small detail that adds value and keeps your brand in their memory.
Add Useful Local Information
Include a small guide about the area around the event. Add maps, food places, transport options, and emergency contacts. This is very helpful for guests who have come from out of town. If the conference is in Canada, you can also mention a few upcoming conferences in Canada to help attendees plan future events or networking opportunities.
Include Sponsor Materials
If sponsors are part of your event, add their flyers or small gifts. Keep it simple so the bag does not feel cluttered. Sponsors appreciate the visibility, and attendees get extra items they might enjoy. Always check that sponsor materials match your event’s tone.
Add a Small Thank-You Gift
Include one small gift to thank attendees for joining. It could be a mug, badge, or reusable bottle with your logo. It shows appreciation and gives them something to remember your event by. Thoughtful gifts can create a good final impression.
Pack Everything Neatly
Arrange all items neatly inside the bag or folder. Keep papers flat and avoid overstuffing. You can use small pockets or envelopes to keep things tidy. A clean, well-organized kit helps attendees find items easily and reflects your event’s care.
Conference Kits That Organizers Often Forget to Prepare
Many organizers focus on big items but forget some small, helpful things. These missing items can make a real difference for attendees. Including them shows care, thought, and good planning. Let’s look at some important items that are often missed but can make every conference kit complete.
Emergency Contact Card
Adding an emergency contact card is a smart safety step. It helps attendees know who to call in case of any problem. Include local emergency numbers and event support contact details. This small card gives peace of mind and keeps everyone prepared for unexpected situations during the event.
First Aid Pack
Simple first aid packs are often forgotten but always useful. Small items like band-aids, wipes, or pain relievers can help attendees quickly. Many people appreciate this thoughtful touch. It shows you care about their comfort and safety, especially during long conference days or travel.
Power Bank or Charging Cable
Including a small power bank or universal charging cable is very helpful. Attendees often use their phones for schedules or directions. A dead battery can cause stress. Providing this item adds real value and helps people stay connected throughout the event without worry.
Hand Sanitizer Bottle
Clean hands are a must, especially in large gatherings. A small hand sanitizer bottle fits easily in any kit. It keeps everyone safe and feeling fresh. Many attendees appreciate this small but important item that supports good hygiene during crowded events.
Reusable Water Bottle
Keeping guests hydrated helps them stay active and focused. A reusable bottle is both useful and eco-friendly. It also reduces plastic waste, which most people appreciate. Adding your event logo can turn it into a lasting souvenir for attendees after the event ends.
Sticky Notes and Markers
People often need quick ways to jot down reminders or share ideas. Sticky notes and markers come in handy during sessions. They also help with networking and teamwork. This simple addition shows that you care about keeping the event interactive and easy for everyone.
Mini Snack Pack
Attendees can get hungry between sessions, and snacks help keep their energy up. Small packs with cookies, nuts, or energy bars work well. It’s a thoughtful way to keep guests happy. Snacks make a great impression, especially when sessions run long or breaks are short.
Wi-Fi Information Card
Many guests spend time searching for the event’s Wi-Fi password. A small printed card with Wi-Fi details saves time and stress. Place it inside the kit where it’s easy to find. This tiny detail makes the experience smoother and helps attendees stay connected all day.
Feedback Form
Feedback helps you understand what attendees liked or missed. Adding a simple feedback form shows you value their opinions. Keep it short and easy to fill out. Collecting feedback right away helps you plan even better kits and events in the future.
Local Area Map
Including a small map helps out-of-town guests find hotels, restaurants, and attractions. It saves time and builds a good impression. You can also include directions to the nearest transport stops. A printed map is handy, even for those who rely on mobile apps.
When Should You Start Preparing and Packing the Kits?
A conference kit requires careful planning, time, and organization. You cannot rush the process, as every small item needs attention. Starting early helps you avoid stress and gives you time to handle delays. A clear timeline keeps everything on track and makes sure your kits are ready before the big day. Before we get into the steps, let’s look at a simple timeline that shows when to start each part of the process.

Six to Eight Weeks Before the Event
Start planning your conference kits early. Make a checklist of items you want to include, such as the event schedule, name tags, pens, and local guides. Contact suppliers for prices and delivery times. Early planning helps you make changes easily if something goes out of stock or takes longer to deliver.
Four Weeks Before the Event
Begin ordering your materials once you have the final list. This includes printed items, sponsor materials, and gift items. Check that the event logo and colors are correct before printing. Confirm delivery dates with suppliers and review your conference kit cost to make sure everything fits within your planned budget. Having everything ordered a month before keeps you safe from last-minute rush or shipping issues.
Two Weeks Before the Event
Start receiving and checking all the items. Inspect for any damage or missing pieces. Gather your team or volunteers and prepare the workspace for packing. It’s also a good time to print final updates to the schedule if needed. Sorting everything early makes the final assembly smoother and faster.
One Week Before the Event
Begin assembling the kits in order. Place larger items first and smaller ones on top to avoid bending or damage. Keep each bag or folder identical for a professional look. Store the packed kits safely in a clean, dry area. Label them clearly if you have different types for guests or speakers.
One Day Before the Event
Do a final count of all the packed kits. Keep a few extra bags ready for late registrations or replacements. Double-check for important items like badges and pens. Arrange transport for moving the kits to the venue. A final check helps you stay confident that everything is ready for the event.
Should You Add Digital Materials Along With Physical Items?
Adding digital materials to a conference kit is a smart and eco-friendly choice. Many people prefer digital access over carrying too many papers. QR codes or USB drives can hold all event files in one place. It also saves printing costs and keeps the kit light, clean, and well-organized for everyone attending.
Digital brochures or links can share speaker bios, session details, and sponsor information easily. Attendees can open them anytime without losing anything. Using digital tools also makes it easy to update or fix information quickly. This small step helps the event look modern and thoughtful while reducing waste overall.
Including both physical and digital materials offers the best balance for your event. Some guests still enjoy printed schedules or notebooks for notes. Others may find it easier to use QR codes on their phones. Mixing both types makes your conference kit more useful, smart, and friendly to the environment.
What Are Some Common Mistakes to Avoid When Preparing Conference Kits?
Preparing conference kits can be simple, but a few common mistakes can spoil the effort. Small errors like poor packaging or missing details can leave a bad impression. These can make guests feel the event was not well planned. Here are some things to avoid so that your kits stay neat and useful.
Overstuffed Bags
Packing too many items may seem helpful, but it often overwhelms attendees. A heavy bag filled with extras can make it hard to carry and find what’s needed. Keep the kit neat with only useful items. While overstuffing or using low-quality materials can ruin the experience, checking out some creative conference survival kit ideas can help you include only practical and thoughtful items that attendees actually use.
Low-Quality Materials
Cheap or weak materials can leave a poor impression. Bags that tear or pens that stop working show a lack of care. Always check product quality before ordering. Spending a little more on strong, reliable materials makes a big difference. A sturdy, well-made kit gives attendees something they will actually enjoy and remember.
Missing Key Information
Leaving out important details like schedules, contact numbers, or venue maps creates confusion. Attendees need this information to stay organized and on time. Double-check that every kit includes these basics. Clear and simple information helps guests feel prepared and reduces unnecessary questions during the event.
Ignoring Practical Use
Adding random items that have no real use is a common mistake. Attendees appreciate things they can use during or after the event. Simple tools like pens, notepads, and charging cables work better. Always focus on usefulness instead of just filling the bag with extra items.
No Personal Touch
A kit that feels too plain or rushed can seem uninviting. Adding a short thank-you note or a small branded item can make a difference. Personalized touches show thought and care. They also make attendees feel valued and happy to be part of the event.
Poor Design Choices
Bright colors or cluttered layouts can make the kit look unprofessional. Stick to your event theme and use clear fonts for all printed materials. Simple and neat design always stands out. A visually pleasing kit reflects well on the event and shows good planning.
Forgetting Eco Options
Using too much plastic or single-use materials is wasteful. Try adding eco-friendly products like paper bags or wooden pens. You can also share digital brochures instead of printing large booklets. Small changes like these help reduce waste and make your event look more responsible.
When and How to Distribute the Conference Kits?
A well-timed distribution of conference kits makes the event start smoothly. If the kits reach attendees at the right moment, it helps them feel welcomed and prepared. Timing also avoids long lines and confusion at the venue. Proper planning for distribution ensures every guest receives their kit quickly and without hassle. Before we go into the timing and methods, let’s look at the best ways to handle kit distribution effectively.
Before the Event
Kits that are sent out ahead of time are effective for virtual or hybrid events. It lets attendees review materials, learn the schedule, and arrive ready. However, shipping costs and delays can be a challenge. If you choose this method, send them at least one week early to ensure everyone gets their kits before the event day.
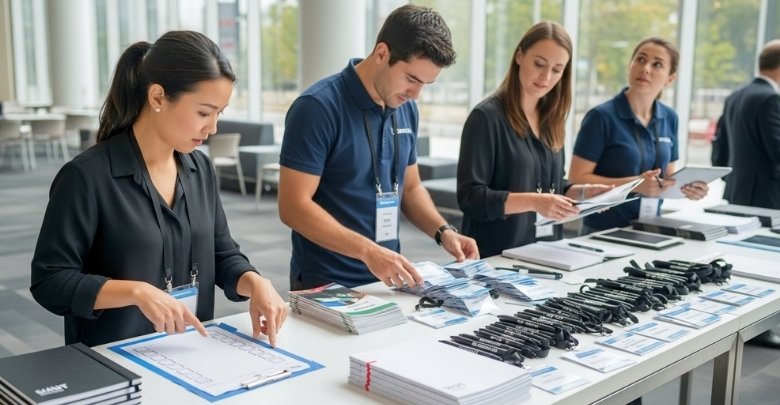
At the Registration Desk
Handing out kits during registration is one of the easiest methods. Attendees expect to collect materials when signing in, which keeps things organized. Have staff ready to check names quickly and hand out the right kits. It’s a good way to welcome guests and make sure no one is missed.
Inside the Welcome Area
Distributing kits in the welcome area keeps entry lines short and smooth. Set up a table near the main door or information booth. Attendees can easily collect their kits after checking in. This method adds a friendly touch and helps create a good first impression as guests enter.
During Opening Session
Some events hand out kits right before the first session begins. This approach can save space at the entrance and keep the process calm. You can place the kits on seats before guests arrive. It’s simple and ensures that everyone in attendance receives their kit without extra effort.
For VIP Guests
If your event includes VIP guests or speakers, consider giving them kits separately. You can hand them out personally or leave them in their hotel rooms. This gesture feels special and shows respect. A personal touch like this adds to the experience and strengthens professional relationships.
For Late Arrivals
Keep a few extra kits ready for guests who arrive late. Have a separate table or desk marked clearly for this purpose. It saves confusion and helps everyone receive the same materials. Always plan for a small number of late arrivals to keep the process smooth and fair.
How to Know If Your Conference Kit Was a Success?
A good conference kit should make attendees feel valued and informed. It must be useful, neat, and simple to understand. Knowing if your kit worked well helps improve future events. Here are some easy ways to find out if your conference kit was truly a success.

Gather Attendee Feedback
Asking attendees for their honest thoughts gives clear insight. Use short surveys or feedback forms right after the event. Ask what they liked most and what felt missing. Their answers will help you know what worked and what needs to change next time.
Observe Kit Usage
During the event, notice how people use the items. Are they wearing name tags, reading schedules, or taking notes? If most items are in use, your kit served its purpose well. When attendees engage with the content, it shows your planning was on point.
Review Leftover Items
After the event, check how many kits or items remain unused. A large number of leftovers often means overpacking or low interest. Reviewing this helps you understand what to include or remove next time. It’s a simple way to measure real usefulness.
Check Material Quality
High-quality materials last longer and leave a strong impression. If attendees keep or reuse items like bags or notebooks, that’s a great sign. Cheap items often end up discarded quickly. Investing in better materials helps your kit stand out and be remembered positively.
Analyze Social Media Posts
Many attendees share their experiences online with photos and reviews. Look for posts that mention your event kit. Positive comments show appreciation for your efforts. This real feedback from social media helps you understand what people enjoyed most about the kit.
Ask the Event Staff
Event staff often notice small details attendees might not mention. Ask them if the kits were easy to hand out and well-received. Their feedback helps you improve organization and packaging. Listening to your team is just as important as hearing from attendees.
Track Sponsor Feedback
Sponsors may also share opinions about the kit’s design and visibility. Ask if their materials were presented well and if attendees noticed them. Good feedback from sponsors means they got the attention they wanted. It’s a sign your kit served both guests and sponsors effectively.
Compare Budget and Results
Review the money spent and the overall response. If the kit stayed within budget and guests were satisfied, it’s a win. Check if every dollar added real value. A balanced cost and strong feedback mean your conference kit was well-planned and successful.
Look at Repeat Attendance
When attendees return for your next event, it means they were happy. A good experience with your kit plays a part in that. Repeat guests often remember how organized and thoughtful your event felt. Their return is one of the strongest signs of success.
Frequently Asked Questions
You might still have a few quick questions about preparing a great conference kit. Below are simple answers to some common questions that can help you plan better.
What Is the Main Purpose of a Conference Kit?
A conference kit gives attendees all the key details and materials they need for the event. It helps them stay organized, informed, and comfortable throughout the sessions. A well-prepared kit also reflects the event’s professionalism and care for its guests.
How Can You Choose Items That Fit the Event Theme?
Choosing items that match the event theme makes the kit look coordinated. For example, if it’s a tech event, include USB drives or digital brochures. For academic events, notebooks or pens work better. Keep your colors and designs consistent with your theme.
Should Conference Kits Be Different for Guests and Speakers?
Yes, it’s a good idea to make separate kits for guests and speakers. Speaker kits can include special gifts, event details, and thank-you notes. Attendees’ kits can focus on schedules, badges, and writing tools. This small difference makes both groups feel appreciated.
How Can You Make Kits Look More Attractive?
Use a clean layout, neat packaging, and matching colors to make kits stand out. Add your logo and use quality printing for a professional look. Neatly arranged items create a good first impression and make the kit look more appealing and organized.
What Is the Best Way to Label Conference Kits?
Label each kit clearly based on type, such as “Speaker,” “VIP,” or “Attendee.” This helps staff distribute them quickly without confusion. Use stickers, tags, or colored ribbons to identify them easily. Clear labeling keeps the process smooth and well-organized.
Can You Add Fun Items to the Conference Kit?
Yes, small fun items can make your kit more memorable. You can add badges, stickers, or themed souvenirs that fit your event. Just make sure they don’t clutter the kit. These light touches add personality and make guests smile.
How Can You Save Money When Making Conference Kits?
Buying items in bulk is the best way to save money. Compare supplier prices and pick simple, useful items instead of expensive extras. Reusable or digital materials also cut costs. Planning early avoids rush fees and helps you stay within budget.
How Important Is Branding in a Conference Kit?
Branding is very important because it promotes your event and company. Add your logo, event name, and website on bags, pens, and notebooks. Keep the design simple and professional. Good branding makes your event memorable and helps guests remember who hosted it.
What Are Some Eco-Friendly Items to Include?
Eco-friendly options include paper folders, bamboo pens, reusable bottles, and cloth bags. You can also share QR codes instead of printed brochures. These small changes reduce waste and show that your event cares about the environment and sustainability.
Should You Include Food Items in Conference Kits?
Adding small snacks like granola bars, nuts, or cookies is a good idea. These help attendees stay energized during sessions. Make sure snacks are sealed, safe, and easy to eat. It’s a thoughtful way to care for your guests’ comfort.
Final Thoughts
A well-thought-out conference kit can turn a simple event into a memorable experience. It shows planning, care, and attention to every small detail. From the welcome letter to the thank-you gift, every item plays a part in making guests feel valued and ready to engage.
When planning how to prepare a conference kit for attendees, focus on what truly helps them. Include only useful, neat, and quality items that reflect your event’s purpose. A mix of practical tools, personal touches, and eco-friendly choices always stands out.
Small efforts create a big impression. So, start early, stay organized, and think about what makes your guests smile. A thoughtful, well-packed kit not only supports your event but also becomes a lasting reminder of your effort and care.