Canada offers many opportunities for people who want to visit, work, or study. If you are in the Philippines and applying for one, an important part of the process is giving your fingerprints and photo. You might be wondering how to do biometrics for Canada visa in Philippines?
Do biometrics for a Canada visa in the Philippines by booking an appointment after receiving your Biometrics Instruction Letter, bringing your passport and required documents, and visiting an official center to provide fingerprints and a photo. Keep the receipt as proof for your application.
If this is the step you are preparing for, you will find every detail you need here. This article explains the process from booking to attending your appointment. It also shares tips and requirements so you can complete it without delays.
How to Do Biometrics for Canada Visa in Philippines?
If you are applying for a Canada visa in the Philippines, one important part of the process is giving your biometrics. Knowing what to prepare and where to go will save you time and effort. Keep reading to see the step-by-step guide on how to do your biometrics for a Canada visa in the Philippines.
Step 1: Understand What Biometrics Means
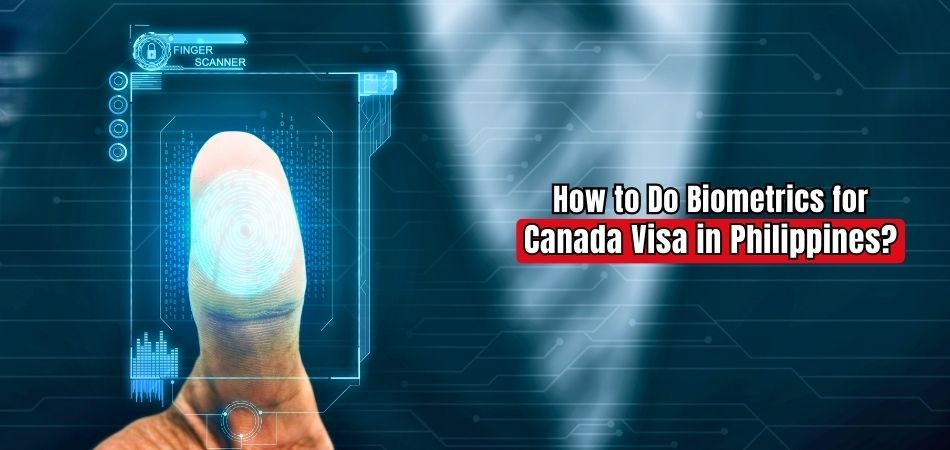
Biometrics is the process of collecting your fingerprints and photo to confirm your identity for security purposes. Canada uses this information to make sure the right person is applying for the visa. If you’re planning to attend an international conference in Canada with invitation letter, completing biometrics is a necessary step before your application can move forward. Most applicants are required to do biometrics to proceed.
Step 2: Wait for Your Biometrics Instruction Letter
After you submit your visa application, Immigration, Refugees and Citizenship Canada (IRCC) will send you a Biometrics Instruction Letter. This letter tells you when you need to do your biometrics and what you must bring. Without this letter, you cannot proceed with the biometrics process. This letter can be issued for different purposes, such as:
Temporary Resident Visa / Study Permit / Work Permit –
Permanent Resident Applications –
Biometrics Re-Collection Letters –
Biometrics for Asylum or Refugee Claims –
Biometrics for Transit Visa Applications –
Step 3: Check the Deadline Carefully
Your instruction letter will have a deadline, usually within 30 days from the date it was issued. You must complete your biometrics before this deadline. Missing it can cause delays or even cancellation of your visa application, so always act quickly once you receive the letter.
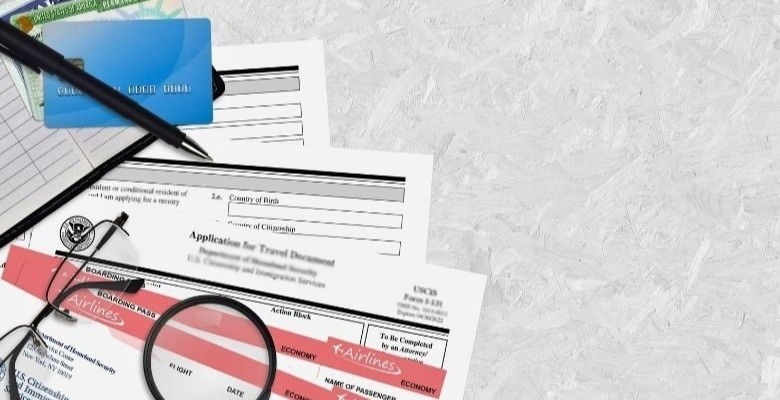
Step 4: Prepare Your Required Documents

It is important to get ready before your biometrics appointment so everything goes smoothly. Being well-prepared helps you avoid delays and keeps the process quick. Check your instruction letter carefully, follow the guidelines, and make sure you have everything you need with you on the day.
For biometrics in the Philippines for a Canada visa, you will need:
- Original passport
- Biometrics Instruction Letter
- Appointment confirmation printout or screenshot
- Biometrics fee receipt (only if you did not pay it during your application)
Keeping all these in one folder will make your visit faster and stress-free.
Step 5: Know What Happens During the Appointment
The biometrics process is quick and simple, but it’s important to know what will happen so you feel prepared. It usually takes less than half an hour and involves scanning your fingerprints and taking your photo. Staff will guide you through each step, so you don’t need to worry.
Here’s what to expect during your appointment:
- Staff will check your appointment confirmation, passport, and Biometrics Instruction Letter
- You will be guided to a station where your fingerprints will be scanned digitally
- Each finger will be scanned, and you may need to repeat a scan if it is unclear
- A digital photo will be taken, with hats, sunglasses, or face coverings removed unless required for religious or medical reasons
- You will receive a confirmation receipt once the biometrics are complete
Step 6: Keep the Confirmation Receipt Safe
After your biometrics are done, you will be given a confirmation receipt as proof. Keep this safe because it is your record that you have completed this step. You do not need to send it to IRCC unless they request it in writing later on.
Step 7: Check if You Need to Do Biometrics Again
Not everyone has to give biometrics every time they apply for a Canada visa. If you have done them before and they are still valid, you may be able to skip this step. Canada generally keeps biometrics valid for ten years from the date they were taken.
Here’s how to check if you need to do biometrics again:
- Visit the official Canada immigration biometrics validity tool online
- Enter your details, such as last name, date of birth, and country of citizenship
- Review the result to see if your biometrics are still valid
- If they are valid, you do not need to book a new biometrics appointment
Step 8: Follow Simple Preparation Tips
A little preparation before your biometrics appointment can make the process faster and more comfortable. These small steps can help you avoid delays and ensure your fingerprints and photo are captured clearly. It’s better to be ready than to risk having to come back.
Here are some tips to follow:
- Arrive at least 15 minutes before your appointment time
- Keep your hands clean and free from cuts or injuries
- Avoid using hand lotion right before the appointment
- Wear simple clothing for a clear and professional-looking photo
- Keep all your documents together in one folder for easy access
Step 9: Wait for Your Application to Continue
Once your biometrics are completed, your visa application will move forward in the process. You don’t need to do anything extra unless IRCC contacts you for more information. Just keep your confirmation receipt and wait for updates about the next steps in your application.
Completing your biometrics is an important part of the Canada visa process, but it’s quick and easy if you are prepared. Follow the steps carefully, keep your documents safe, and meet the deadline. Once done, your application will move forward without unnecessary delays.
Where Can You Give Biometrics for a Canada Visa in the Philippines?
Your fingerprints and photo for a Canada visa are collected at Visa Application Centres (VACs) in the Philippines. These centers are run by VFS Global Philippines, working under an official agreement with Immigration, Refugees and Citizenship Canada (IRCC). They handle the process securely, making sure your biometrics are sent directly to Canada for your application.
There are two main VAC locations where you can give your biometrics:
- Manila: Canada Visa Application Centre – 29th Floor, The World Center Building, 330 Sen. Gil J. Puyat Avenue, Makati City, Metro Manila.
- Cebu: Canada Visa Application Centre – 9th Floor, Unit 905, Kepwealth Center, Samar Loop corner Cardinal Rosales Avenue, Cebu Business Park, Cebu City.
Things You Need to Do Before Visiting the VACs
Before heading to a Visa Application Centre, ensure you have completed your visa application and scheduled an appointment for biometrics collection. Additionally, gather all necessary documents, including your passport and any confirmation letters, to streamline the process.
- Book an appointment: You must secure a VFS canada biometric appointment in the Philippines before going to the VAC. This can be done online through the official VFS Global website or by calling their helpline. Without an appointment, you won’t be allowed to submit your biometrics.
- Check operating hours: The Manila VAC is open Monday to Friday, 7:00 AM to 4:00 PM. Cebu VAC is open Monday to Friday, 7:00 AM to 3:00 PM.
How to Book an Appointment for Biometrics in Philippines?
Booking your biometrics appointment online is a quick and simple process. You only need your Biometrics Instruction Letter from IRCC to begin. The online system lets you choose a date and location easily. Once confirmed, you just need to attend and complete your biometrics.

Step 1: Visit the VFS Global Website
Start by going to the official VFS Global Philippines website for Canada visa services. Make sure to select the correct country and visa type on the page. This ensures the appointment system shows only the right locations for you. You can access details about the Manila and Cebu Visa Application Centres there. Double-check the website address to avoid fake links and incorrect booking pages.
Step 2: Create or Log in to Your Account
For new users, register by providing your email address and creating a password. Returning users can simply log in using their registered details for faster access. Your account helps store your booking history and appointment confirmations safely. It also allows you to change or reschedule an appointment if required. Make sure your email is active, as VFS will send updates there.
Step 3: Select ‘Schedule an Appointment’
Inside your account dashboard, look for the option called “Schedule an Appointment.” You will then need to select the visa category and the location you prefer. Choices usually include either the Manila or Cebu Visa Application Centre. After selecting, the system will take you to the next step for personal details. Always be careful with selections, as wrong entries can cause delays.
Step 4: Enter Your Personal Details
Carefully type in your name, passport number, date of birth, and contact information. All these details must exactly match what is on your visa application. The system will also ask for your Biometrics Instruction Letter reference number. This number links your booking to your Canada visa application. Even one wrong letter or number could cause problems at your appointment. Take time to double-check every field before going forward.
Step 5: Choose Your Date and Time
Look through the available appointment slots that the system shows you. Pick the date and time that fits your schedule best and is before your deadline. Appointment availability can often change when people cancel, so check regularly. If all slots are full, try booking again later in the day. Once you choose your slot, the system will lock it for confirmation.
Step 6: Confirm and Save Your Appointment
Review all details to make sure nothing is missing or incorrect. This is the final step before your appointment is officially confirmed in the system. Once confirmed, download your appointment letter and save a screenshot as backup. You will need this letter when you arrive at the VAC. Keep both a printed and digital copy to avoid problems if you misplace one.
Step 7: Pay Any Required Fees (If Applicable)
If you have not yet paid your biometrics fee, you may do it now. Payment instructions will be given through the system if it is required. Some applicants already pay during the online visa application process. In such cases, you only need to bring the payment receipt for proof. Without payment confirmation, your biometrics appointment may be cancelled or delayed.
Doing your biometrics booking online is simple if you follow the steps carefully. Always double-check your details before confirming the appointment to avoid problems later. Keep your documents safe and organized before going to the Visa Application Centre. Arrive on time and bring everything needed for a smooth and quick process.
How Much Does Biometrics Cost and How Long Does It Take for a Canada Visa in the Philippines?
When applying for a Canada visa, biometrics fees must be paid before you can book your appointment at VFS Global Philippines. These fees are charged by Immigration, Refugees and Citizenship Canada (IRCC) and are the same worldwide.
| Applicant Type | Fee (CAD) | Approx. Fee in PHP (based on PHP 41–44 per CAD) |
| Individual Applicant | $85 | PHP 3,485 – PHP 3,740 |
| Family (2 or more) | $170 | PHP 6,970 – PHP 7,480 |
| Group of Performing Artists | $255 | PHP 10,455 – PHP 11,220 |
Note: The peso amount depends on the exchange rate used by VFS Global Philippines at the time of payment.

1. Cost for Individuals
According to the IRCC official website, if you are applying alone, the biometrics fee is CAD $85 per person. This is a one-time fee for the entire visa application process. You will not need to pay it again unless your biometrics expire and you apply for another visa in the future.
2. Cost for Families
If two or more eligible family members apply for their visas at the same time and place, the biometrics fee is capped at CAD $170 total. This means that no matter how many family members are included in the group, the maximum fee is CAD $170, as long as all applications are submitted together.
3. Cost for Groups of Performers
If you are part of a group of performing artists and apply together, the biometrics fee is CAD $255 total for the entire group.
4. What the Biometrics Fee Covers
The biometrics fee is not just for taking your fingerprints and photo. It also includes:
- Capturing and storing your biometric information in Canada’s secure immigration database
- Sending your data securely to IRCC in Canada for processing
- Using your biometrics for future applications for up to 10 years (if still valid)
5. Ways to Pay the Biometrics Fee
If Applying Online
When you submit your Canada visa application through the IRCC online portal, you will be asked to pay your visa application fee and your biometrics fee together.
- How you pay: The payment is made through the IRCC secure online payment system using a valid credit card (Visa, MasterCard, American Express, JCB, UnionPay, or sometimes a prepaid credit card). Debit cards are generally not accepted unless they are enabled for international online transactions.
- What happens next: Once the payment goes through, the system will automatically issue your official receipt. This receipt will show both the visa application fee and the biometrics fee.
- Why it’s better: Paying online with your application means IRCC can issue your Biometrics Instruction Letter (BIL) faster. As soon as you receive the BIL, you can book your VFS Canada biometric appointment Philippines.
If Applying Through VFS Global Philippines
You can pay the biometrics fee directly at one of the VFS Global Philippines Visa Application Centres (Manila or Cebu) when submitting your visa application.
- How you pay: Payment can be made in cash (Philippine pesos, based on the current exchange rate) or by card (debit or credit, depending on the VAC’s accepted payment methods). It’s best to confirm with the VAC beforehand if your card type is accepted.
- What happens next: After paying, VFS will issue you an official payment receipt for the biometrics fee. This receipt must be attached to your application record and is required for booking your biometrics appointment.
- Possible delays: Unlike online payment, paying at the VAC may delay your ability to book an appointment. This is because IRCC needs to confirm your payment in their system before they can issue your Biometrics Instruction Letter (BIL). This step may take one or more business days, depending on processing times.
- Tip: If you are in a hurry to complete your biometrics, it’s faster to pay the fee online during your visa application instead of paying later at the VAC.
5. Verify Your Payment Was Received by IRCC
- If you paid online: Log into your IRCC account and check under “View Submitted Applications” for confirmation.
- If you paid at VFS: Wait for your Biometrics Instruction Letter (BIL) to be emailed or posted in your IRCC account. This confirms the payment was processed.
6. Refund Policy for Biometrics Fees
- If IRCC decides you do not need to give biometrics after you’ve paid, you can request a refund through your IRCC account.
- Refunds are issued to the original payment method, which may take several weeks.
- If you miss your appointment or fail to attend within the 30-day deadline, the fee is not automatically refunded—you must request it through IRCC.
Paying your biometrics fee correctly and on time is the first step to securing your appointment. Choose the payment method that works best for you, keep your receipt safe, and always confirm your payment before booking to avoid any delays in your Canada visa process.
Who is Exempt From Giving Biometrics for a Canada Visa in the Philippines?
Applying for a Canadian visa in the Philippines often involves giving fingerprints and a photo as part of the process. These biometrics help confirm your identity and keep secure records for immigration purposes. Not everyone, however, needs to complete this step. If you’d like to know whether you qualify for an exemption, the full list is explained below.
- Canadian citizens: People who already hold Canadian citizenship do not need to give fingerprints or a photo because they already have the right to enter Canada.
- Permanent residents: Anyone who is already a permanent resident of Canada is not asked for biometrics again when applying for other Canadian documents.
- Children under 14 years old: Kids younger than 14 do not have to give fingerprints or photos when applying for a Canadian visa.
- People over 79 years old: Applicants aged above 79 are excused from giving biometrics unless they are making an asylum claim, where this rule does not apply.
- Visa-exempt tourists with eTA: Nationals from countries that do not need a visa, but have an approved eTA, are not required to give biometrics for short visits.
- Diplomatic or official visa applicants: People applying for a diplomatic or official visa do not have to give biometrics if they are traveling for official government work.
- Heads of state or government: Leaders visiting Canada for official duties are fully exempt from giving biometrics as part of their visa application process.
Understanding these exemptions can make your visa application process smoother and faster. Always check the official guidelines before starting your application to avoid surprises. If you are unsure about your case, seek help from an authorized visa service. Staying informed will save both time and effort in the long run.
How Does the Canada Visa Application Process Continue in the Philippines?
Applying for a Canada visa from the Philippines involves several important steps. The process is quite straightforward if you follow the correct order. You need to prepare documents, attend in-person requirements, and wait for a decision. Once you understand each stage, it becomes easier to complete everything successfully.
Submit your application
The first stage requires choosing between online or paper-based application methods. Online applications are done through the official Government of Canada website. This involves creating an account, filling in forms, uploading files, and paying fees. Paper applications must be submitted through a Visa Application Centre in the Philippines. Each method requires following the instructions carefully to avoid mistakes. Make sure all your forms are complete before you submit them for review.

Give your biometrics
After sending your application, you will receive a biometrics instruction letter. This letter must be taken to a Visa Application Centre in your area. Biometrics include fingerprints and a digital photo taken by staff. It is important to do this as soon as possible to avoid delays. Locations are available in Manila and Cebu for applicants. Without biometrics, your application will not move forward in the process.
Application review by IRCC
Once you have completed your appointment, there are important follow-up actions in the Canada visa process. These include the steps after biometrics for Canada visa, which lead to the final decision. The Canadian immigration office will review all documents to ensure they meet requirements. If they need more details, they will contact you quickly. Always respond to requests as soon as possible to avoid slowing the process. This review may take several weeks based on application volume.
Possible medical exam and police clearance
In some cases, the immigration office might require extra security and health checks. This may include a medical exam with an approved panel doctor. A police clearance certificate from your local authorities may also be requested. These checks ensure you meet Canada’s health and safety requirements. If asked, complete these steps as soon as possible to avoid delays. Keep all official receipts and records for future reference during your application.
Decision on your application
When the review is finished, you will receive the decision on your file. This decision will be sent to your online account or through the Visa Application Centre. If your visa is approved, you will need to submit your passport. This is done so the visa can be stamped or printed on it. The VAC will return your passport after processing. If refuse, you will get a letter explaining the reasons.
Submit your passport if approved
After approval, your next step is to send your passport. This is required for visa printing before you can travel. You can send it directly to the Visa Application Centre handling your case. Make sure your passport is valid for your planned travel dates. You will also need to pay for the return courier service. Once your passport is returned, your visa will be ready for use immediately.
Prepare for travel
Once you have your passport back, you can arrange your travel. It is a good idea to carry copies of all application documents. Immigration officers may request to see these when you arrive in Canada. Ensure your travel ticket and accommodation are properly booked before leaving. Keep all your important papers together for easy access. This will make your entry process at the Canadian border much smoother and faster.
Getting a Canada visa from the Philippines is a detailed process. Each step must be done correctly to avoid wasting time and money. Missing a requirement can cause long delays and even refusals. Planning ahead and preparing documents early will make the process smoother.
What Common Mistakes Should You Avoid During Biometrics for a Canada Visa in the Philippines?
- Arriving late: Being late for your appointment can make you lose your slot and force you to book again, delaying your visa process for weeks.
- Booking too late: Waiting too long after getting your Biometric Instruction Letter can leave you with fewer available slots and much longer waiting times.
- Incomplete documents: Forgetting required papers like your passport or appointment slip can result in a canceled appointment and wasted travel to the centre.
- Not checking details: Skipping the step of reviewing your captured fingerprints and photo can allow mistakes to remain in your file and cause future issues.
- Dirty or wet fingers: Going with oily, damp, or dirty fingers can lead to unclear fingerprint scans that may require you to repeat the appointment.
- Wrong details on documents: Having errors in your name, birth date, or passport number can cause confusion and delays if not corrected before biometrics.
Things That Can Slow Down Your Canada Visa Application
Sometimes a Canada visa takes longer than expected to process. Delays can happen for different reasons, and not all of them are in your control. Small mistakes or missing steps can also cause slowdowns. Let’s see what could hold things back.

Incomplete documents
A missing document can easily put your application on hold for weeks. Visa officers need every file to be complete before they can continue reviewing it. Even a small missing page from your passport or a simple signature issue can stop progress. Always double-check your checklist before submitting anything. This extra care ensures your file moves without unnecessary interruptions and saves you from having to resubmit documents later.
Extra security checks
Sometimes the immigration office decides to run extra background checks on applicants. These checks can take time because they may involve other government agencies. Factors like past travel history or name similarities can trigger them. Your visa timeline depends on many factors. In some cases, Canada visa processing delays after biometrics happen because of additional checks or incomplete details. While these are often unavoidable, ensuring accurate documents can help speed things up.
Medical requirements
If you are asked to complete a medical exam, it must be done with an approved panel doctor. Scheduling an appointment can sometimes take days or even weeks depending on the location. Results also take time to be sent to immigration officers for review. To avoid slowing your application, book the exam as soon as you get the request. Delaying this step can add weeks to your processing time unnecessarily.
Wrong application details
Incorrect details in your application can create big problems in processing. This includes wrong passport numbers, misspelled names, or inaccurate travel history dates. Visa officers will have to pause your file and contact you to confirm the right information. Fixing these mistakes takes extra time and slows progress. Always check every section of your application before submitting it to make sure all information matches your official documents exactly.
Late responses
Sometimes the immigration office will contact you to request extra documents or clarifications. If you take too long to reply, your file will simply stay on hold. Every day you delay your reply can push your decision further back. The best way to avoid this is to check your email and online account daily. Responding quickly shows you are prepared and keeps the process moving steadily forward.
Even the smallest mistake can cause big delays in a visa process. Taking your time to check everything before sending it makes a big difference. Quick replies and accurate details also help keep things on track. Planning ahead can save you weeks of waiting.
FAQs About How to Do Biometrics for Canada Visa in Philippines?
If you are getting ready for your Canada visa biometrics in the Philippines, you might have some questions in mind. Understanding what to expect can make the process much easier. Below are some common questions and answers to help you feel ready. These will guide you through extra details not already discussed above.
Can I Walk in Without an Appointment for Biometrics?
You cannot simply walk into a Visa Application Centre for biometrics without an appointment. The centres require an appointment so they can manage the flow of people. Without one, you will not be allowed to enter. Booking your appointment early ensures you have a confirmed time and can avoid delays in your visa process.
What Should I Wear for My Biometrics Appointment?
You should wear comfortable and simple clothes for your appointment. Avoid bright patterns, flashy accessories, or hats unless required for religious reasons. This is because a clear photo is taken as part of biometrics. Choosing neat clothing can help create a good, professional-looking picture for your file.
Can I Bring Someone With Me to the Appointment?
If you are an adult, you generally must attend alone. However, minors or people needing assistance may be allowed to bring a guardian or helper. The Visa Application Centre may have limits on extra visitors. It is best to check the rules of your chosen centre before going.
How Long Does a Biometrics Appointment Take?
The appointment usually lasts less than 30 minutes. This includes the time for document checking, fingerprint scanning, and taking your photo. Sometimes it can be shorter if there are no delays. Arriving early and having all documents ready helps finish the process faster.
Is There a Dress Code for the Photo in Biometrics?
There is no strict dress code, but your face must be visible. Head coverings are allowed only for medical or religious reasons. Sunglasses and tinted glasses must be removed for the photo. Wearing plain clothing is best to avoid distracting backgrounds in your picture.
Can I Visit Any VAC Location for My Biometrics Appointment?
You must go to the specific VAC location where your appointment is booked. For example, if your appointment is in Manila, you cannot go to the Cebu centre. The appointment system locks you into one location to keep the process organized. Make sure you know the correct VAC Philippines address before your visit.
Can I Reschedule My Biometrics Appointment?
Yes, you can reschedule if you cannot attend your original appointment. This can be done through the online booking system. However, you must still complete biometrics before the deadline given in your instruction letter. Rescheduling too close to the deadline can risk missing it completely.
Will My Biometrics Be Used for Future Applications?
Yes, Canada usually keeps biometrics valid for ten years. If you apply for another visa during this period, you might not need to do them again. This saves time and money for future applications. You can check the validity through Canada’s official biometrics tool online.
What Happens If My Fingerprints Cannot Be Captured Clearly?
If the machine cannot read your fingerprints, staff may ask you to try again. This can happen if your fingers are too dry, wet, or have cuts. They may clean the scanner and guide you on proper hand placement. In rare cases, you might be asked to return on another day.
Conclusion
Completing your biometrics for a Canada visa in the Philippines is straightforward if you prepare documents, book on time, and follow the instructions. This short and clear process is the answer to how to do biometrics for Canada visa in Philippines.
Being organized and arriving early can make your appointment stress-free. Keep documents ready, avoid mistakes, and follow small preparation tips. Wishing you a smooth biometrics appointment and the best outcome for your Canada visa application.