Setting up a conference room isn’t only about the right chairs or a good table; the monitor plays a central role too. If it’s mounted too high or too low, people end up straining their necks or missing important details on the screen. A well-placed monitor makes every meeting more comfortable and effective.
So, how high should a conference room monitor be mounted? A conference room monitor should be mounted so the center of the screen is 40–54 inches (101–137 cm) from the floor, aligning with natural eye level when seated. This height strikes the perfect balance between visibility and comfort, ensuring clear views without causing neck strain.
This guide walks you through the best practices for conference room TV height, with easy rules, quick calculations, and simple checks anyone can do. From small huddle rooms to large boardrooms, you’ll find tips that keep meetings professional, inclusive, and stress-free.

How High Should a Conference Room Monitor Be Mounted?
The best height for a conference room monitor is when the center of the screen is close to the seated eye level of your audience. Most experts recommend a range of 40–54 inches (101–137 cm) from the floor, with 48 inches being a reliable starting point. This height helps everyone in the room see clearly and avoids neck strain during long meetings, which is especially important when preparing spaces for upcoming conferences or important presentations. Here are the key measurements and setup steps to mount a conference room monitor correctly:
Quick Reference Table
| Guideline Type | Recommended Height (from floor) |
| Center of screen | 40–54 inches (101–137 cm) |
| Bottom of screen | 36–40 inches (91–102 cm) |
| Eye level (seated) | 40–48 inches (101–122 cm) |
Mounting Height Quick Guide
- Seated Rooms: Center ≈ 48 inches from floor (adjust ± a few inches if table/chairs are higher or lower).
- Standing Rooms: Center ≈ 60–62 inches from floor.
- Formula: Bottom height = Center height − (Screen height ÷ 2).
- Comfort Check: Sit in the back row and confirm the top of the screen isn’t more than ~30° above eye level.
Center of Screen at Eye Level
Placing the monitor’s center at seated eye level ensures that viewing feels natural for everyone in the room. Most setups work best when the center is 40–48 inches from the floor, though taller chairs or raised platforms may require adjustments. Matching the center to eye level prevents neck strain, keeps participants comfortable, and makes presentations easier to follow.
Bottom of Screen Height
Many installers recommend positioning the bottom of the screen 36–40 inches above the floor. This allows for clear visibility above laptops, notebooks, or microphones that might sit on the table. If your conference table often has taller objects, consider raising the monitor slightly—but always check that the top doesn’t go so high it forces people to look up uncomfortably.
Room Layout and Viewing Distance
The right height also depends on room size and seating distance. In large or long conference rooms, placing the screen closer to 48–54 inches helps those in the back maintain a clear line of sight. For smaller rooms, a lower center closer to 40 inches works better. Test the placement from multiple seating positions to confirm comfort and visibility.
Ergonomics and Comfort
Monitor height plays a major role in how relaxed participants feel during long meetings. A poorly placed screen can lead to neck or eye strain, which distracts people and reduces focus. By aligning the monitor with natural eye level, you keep participants engaged and comfortable. If you’re unsure, experiment with small adjustments until everyone can watch without straining.
Adjustable Mounts
Not every meeting is the same, so adjustable mounts can make your setup more flexible. With an adjustable mount, you can raise or lower the screen for different groups, meeting formats, or even hybrid calls. This flexibility is especially useful in multi-purpose rooms where seating arrangements change often. A quick adjustment ensures every participant always has the best possible view.
The Core Rule: Match the Center of the Screen to the Audience’s Eye Level
The golden rule for mounting a conference room monitor is simple: align the center of the screen with your audience’s eye level. For seated rooms, this usually means 40–48 inches from the floor, while larger spaces may go a bit higher, up to 54 inches. If your setup uses taller chairs, a platform, or unique furniture, adjust the height slightly so sightlines remain clear. Keeping the center at eye level prevents neck strain and ensures that participants across the room can focus on the content instead of struggling with discomfort.
Bottom of Screen Height
Once you set the center, you can quickly calculate the bottom of the screen with this formula:
Bottom height = Center height − (Screen height ÷ 2)
In practice, this places the bottom edge around 36 – 40 inches above the floor for most displays in seated rooms. This range helps prevent laptops, microphones, or table items from blocking the screen while keeping the top from going so high that people must tilt their heads upward. Always test by sitting in the back and at the sides. If the screen is visible without strain, you’ve found the right placement.
Conference Room TV Height Calculator
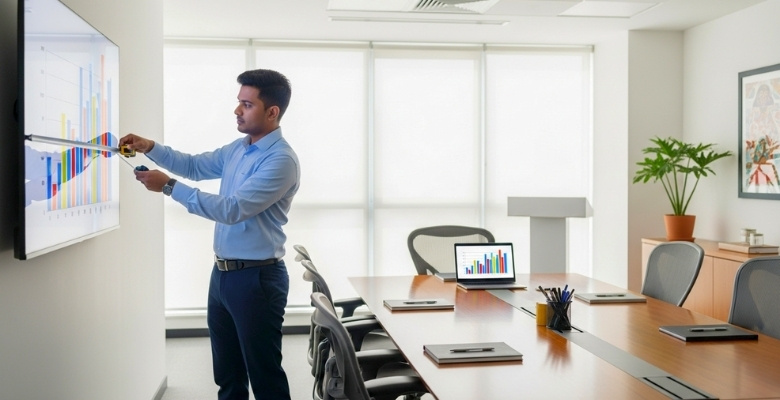
Mounting a conference room monitor doesn’t have to be guesswork. A simple calculation lets you set the right height for any screen size and room setup. Start by deciding if your setup is seated or standing, then note your screen size and the distance to the closest viewer. With these three inputs, you can determine the exact meeting room TV height and avoid common errors.
Inputs:
- Seating type (seated or standing)
- Screen diagonal (inches)
- Closest viewer distance (feet)
Outputs:
- Center Height: For seated rooms, about 48″; for standing rooms, 60–62″.
- Bottom Height: Use the formula → Center height − (Screen height ÷ 2).
- Comfort Check: Make sure the top of the screen stays within 30° of eye level for the closest viewer.
Example: A 65″ screen is about 32″ tall. If you set the center at 48″, the bottom works out to 32″. At 8 feet away, the top is still within a comfortable angle, so the mount is correct.
This calculator method saves time, avoids multiple drill holes, and ensures ergonomic comfort for everyone in the room.
Monitor Height Lookup & Comfort Check
Getting the exact mounting height is easier when you combine quick numbers with a simple comfort test. The table below shows the bottom heights for common screen sizes when the center is placed at either 48 inches (seated setup) or 54 inches (large rooms). Use these values as a starting point, then confirm comfort with a sightline check.
Lookup Table for Common 16:9 Displays
| Screen Size | Screen Height (approx.) | Center at 48″ → Bottom Height | Center at 54″ → Bottom Height |
| 55″ | 27″ | 34.5″ | 40.5″ |
| 65″ | 32″ | 32.0″ | 38.0″ |
| 75″ | 37″ | 29.5″ | 35.5″ |
| 86″ | 42″ | 27.0″ | 33.0″ |
(Heights are from the floor to the bottom of the screen.)
Sightline Comfort Check
After using the table, always confirm the placement in the actual room. Sit in the closest seat and check whether the top of the screen stays within 30° above your eye level. If you need to tilt your head back noticeably, the monitor is too high. This quick check ensures that everyone, even those in the front row, can view the screen comfortably.
By combining the lookup values with a real-world test, you’ll avoid guesswork and make sure your conference room monitor is mounted at the best possible height.
How Does Monitor Size Change Mounting Choices?
The size of your monitor directly affects how and where it can be mounted. Large monitors for conference rooms usually need more wall space, stronger brackets, and sometimes a slightly higher placement so people in the back can see. Smaller displays fit more easily in compact rooms but can limit visibility if seating stretches too far.
| Factor | Small Monitor (e.g., 55″) | Large Monitor (e.g., 86″) |
| Wall Space Needed | Less | More |
| Mounting Height | Lower (center 40–48″) | Higher (center up to 54″) |
| Viewing Distance | Shorter | Longer |
| Risk of Obstruction | Lower | Higher |
| Ergonomics | Easier to fit the standard | Needs careful planning |
How to Choose the Right Monitor Size for the Conference Room?
The size of your monitor should match the distance to the farthest viewer. A small screen might work for close seats, but it will frustrate people at the back. Use the 4/6/8 rule as a guide: 4× screen height for detailed work, 6× for presentations, and 8× for casual viewing. Larger rooms typically need larger displays to keep everyone engaged, so always think carefully about the right TV size for conference rooms before making a final choice.
Seating Layout Notes
Even with the right screen size, poor seating arrangements can block views. Avoid tall centerpieces, microphones, or high-back chairs that hide the lower part of the display. Before fixing the screen, sit in different positions around the table and confirm clear sightlines for all seats. A good layout ensures everyone can follow the meeting comfortably, no matter the conference room monitor size you choose.
Visibility, Safety, and Accessibility Tips
Mounting the monitor at the right height is only part of creating a good meeting space. You also need to check how lighting affects visibility and make sure the setup is safe and accessible for everyone. These small steps help the room feel professional, comfortable, and welcoming, forming the base of a reliable conference room TV setup.
Lighting, Tilt, and Glare
Glare from windows or ceiling lights can ruin visibility even if the monitor is at the right height. Use a slight downward tilt to cut reflections and walk around the room to test the view from multiple seats. Adjust blinds or reposition lights if needed so the display looks clear from every angle.
Accessibility and Safety
Conference rooms should work for all users. Keep paths clear so people can move around without tripping over cables or furniture. If you use a touch-enabled display, mount it at a height that’s easy to reach for seated participants as well. A safe, accessible setup makes the room practical and inclusive for everyone.
Video Meetings: Camera & Soundbar Placement
For hybrid meetings, the monitor’s placement should work hand in hand with your camera and audio. Many modern conference room monitors with camera options already come designed for this purpose, making setup smoother. Keep the camera near eye level, just above or below the display, for natural eye contact. Place the soundbar directly under the screen so voices match the images, making conversations feel seamless for both in-room and remote participants.
Benefits of Mounting the Conference Room Monitor in an Ideal Space
Placing the monitor at the correct height and position does more than improve looks – it changes how the entire meeting feels. A well-mounted screen makes communication easier, prevents distractions, and helps the room function smoothly. Here are the key benefits you can expect when the monitor is installed in the right spot.
Clear Communication & Comfort
A properly mounted monitor makes it easy for everyone to follow what’s on the screen without leaning forward or straining their necks. When the display is set at eye level, conversations flow naturally and no one loses focus. This keeps meetings more productive, as people can share ideas and information without interruptions.
Better Visibility for All
Correct placement ensures that participants in both the front and back rows enjoy the same clear view. It eliminates awkward squinting or shifting in chairs to catch details. By keeping the entire display visible from every seat, meetings run more smoothly and attendees are more likely to stay attentive from start to finish.
Saves Space
Wall-mounted monitors free up valuable table space, making the room less cluttered and easier to use. Without the screen taking up surface area, participants have more space for laptops, notes, and personal items. A cleaner, open layout not only improves comfort but also makes collaboration more natural and organized.
Professional Look
A neatly placed monitor gives the room a polished, professional feel. Visitors immediately notice when a meeting space looks well-organized and thoughtfully designed. This creates a positive impression, especially during client or partner meetings, and helps people take the session more seriously. An orderly environment reflects well on the entire team.
Easy Collaboration & Flexibility
When the monitor is placed at the right height, interactive features such as touch or annotation tools become easier to use. This supports group brainstorming sessions and quick idea sharing. The setup also adapts easily for video calls, small group discussions, or larger team meetings, making the room versatile for different types of gatherings.
Special Room Types
Different rooms call for different mounting heights. In huddle rooms, lower the monitor slightly since participants sit close. In long boardrooms, raising the boardroom screen a few inches higher ensures back-row seats have a clear view. For standing rooms, set the screen’s center around 60–62 inches from the floor to match natural eye level.
Drawbacks of Mounting the Conference Room Monitor in the Wrong Space
Placing a monitor in the wrong spot can create discomfort, confusion, and even safety risks. A poorly mounted screen doesn’t just look unprofessional; it can make meetings harder for everyone in the room. Here are the key problems you should avoid.
Common Problems Checklist
- Participants squint, lean, or crane their necks
- Objects on the table block the lower part of the screen
- Long cables stretch across walkways
- Ports are hard to reach or connect to
- The display blocks windows, seating, or décor
- Touch display is too high or too low for users
- Camera or microphone view is obstructed
Visibility & Comfort
If the monitor is too high, too low, or too small, participants will strain their eyes or crane their necks. People in the back may miss important details, while those in the front may feel uncomfortable. Poor visibility makes it difficult to stay focused and lowers the overall quality of the meeting.
Usability & Tech Issues
Wrong placement often blocks access to important tools like whiteboards, microphones, or ports. Long cables stretched across the room look messy and can trip participants. In some cases, poor positioning may even weaken Wi-Fi signals or limit where devices can connect – similar to the challenges of positioning a projector in a conference room, where setup directly affects both visibility and connectivity.
Room Design & Safety
A badly placed screen can cover windows, interfere with seating, or make the space feel cramped. Furniture or table setups may end up blocking part of the screen, frustrating participants. Loose cables on the floor not only clutter the room but also create safety hazards when people move around.
Accessibility Concerns
Improper placement can make it harder for people with mobility needs to move around the room or reach the display. A screen that’s too high for touch use excludes some participants from joining in. Poor positioning may also block cameras or microphones, making virtual attendees feel left out.
Common Mistakes and Quick Fixes
Even with clear guidelines, many teams slip into small mistakes when mounting a conference room monitor. These errors can seem minor at first, but they often lead to poor visibility, technical issues, and wasted time. Knowing the most common mistakes and how to fix them will help you set up your room the right way and improve your overall conference room monitor setup.
Mistake: Mounting the Monitor Too High
- Quick Fix: A screen set too high makes people tilt their heads upward, which quickly causes neck strain. Keep the center of the display around seated eye level (40–48″) so everyone can watch comfortably for longer meetings.
Mistake: Mounting the Monitor Too Low
- Quick Fix: When the bottom of the screen sits too low, laptops and microphones block the view. Raise the monitor so the bottom edge is at least 36″ off the floor, keeping the screen clear while avoiding an overly high top edge.
Mistake: Ignoring Obstructions
- Quick Fix: Furniture, tall centerpieces, or even table microphones can hide important parts of the display. Always sit in multiple seats before finalizing placement to ensure every angle provides a clear view.
Mistake: Choosing an Undersized Display
- Quick Fix: A small screen makes it impossible for people at the back to follow the details. Apply the 4/6/8 rule to size your display correctly so all participants, near and far, can see comfortably.
Mistake: Poor Camera Placement
- Quick Fix: Cameras mounted too high or off to the side distort eye contact for remote participants. Place the camera just above or below the monitor at eye level so virtual meetings feel natural and engaging.
Mistake: Messy or Unsafe Cables
- Quick Fix: Cables across the floor create trip hazards and make the room look unprofessional. Use cable covers or wall channels to keep wires neat, safe, and out of sight.
Most of these mistakes are simple to fix with careful planning. Taking the time to measure, test different seats, and tidy up cables will make your meeting space far more effective and comfortable. A little attention to detail now prevents constant frustration later.
Frequently Asked Questions
Even after learning about the right height and placement, many people still wonder about practical details that affect their conference room setup. Here are some extra questions people often ask, along with simple, clear answers.
Can One Monitor Work for Both Small and Large Meetings?
Yes, a single monitor can work if it’s large enough and positioned correctly. For smaller meetings, it feels natural at eye level, while larger groups may require a slightly higher mount. Always test visibility from every seat.
How Often Should Monitor Placement Be Reviewed?
It’s a good idea to review monitor placement whenever seating or furniture changes. A new table height or layout can affect sightlines. Checking placement every few months helps ensure comfort and clear visibility for all participants.
Is It Better to Use a TV or a Professional Display?
Both can work, but professional displays are built for longer use and clearer images in bright rooms. TVs are often cheaper, but may lack durability. Choose based on your meeting frequency and budget needs.
What Is the Ideal Wall for Mounting a Monitor?
The best wall is one free from windows, direct sunlight, or heavy glare. Avoid walls with air vents or frequent foot traffic behind them. A solid, central wall usually provides the best balance of visibility and stability.
Can a Monitor Be Mounted Above a Whiteboard?
It’s possible, but not always ideal. A monitor mounted too high above a whiteboard may cause discomfort during long sessions. If necessary, balance both tools by ensuring the screen’s center remains within a comfortable viewing range.
Do I Need a Separate Mount for Touchscreen Displays?
Yes, touchscreen displays often require adjustable or lower mounts. This makes them easier to reach and use for interactive sessions. Standard fixed mounts can be too high, making collaboration uncomfortable or impractical.
Should I Consider Using Two Monitors Instead of One?
In larger rooms, two monitors can improve visibility for everyone. One screen at the front and another at the side or back ensures no participant feels left out. This setup works especially well for hybrid meetings.
Can Monitor Placement Affect Sound Quality?
Yes, placing a monitor in the wrong spot can block speakers or microphones. When the screen sits too close to sound equipment, echoes or muffling can occur. Always check audio quality during setup along with visuals.
Concluding Words
Mounting a monitor in the right spot makes a real difference in how meetings feel and flow. When people don’t need to strain their eyes or necks, they stay focused and engaged.
The simple rule is to keep the screen’s center close to seated eye level, while making small adjustments based on room size and furniture. This answers the common question, how high should a conference room monitor be mounted without any confusion, and also guides you in choosing the right monitor for meeting room setups.
By following these guidelines, you create a space that is not only professional but also comfortable for everyone. A well-placed monitor turns meetings into smooth, productive sessions instead of tiring ones, no matter the size of your conference room.


