Editing videos can feel overwhelming, especially when you spot mistakes after spending hours perfecting your work. But don’t worry — fixing editing mistakes doesn’t have to be stressful. You can polish your videos more easily than ever with CapCut Desktop Video Editor. CapCut gives you the AI tools such as Text to Speech, and BG Remover, to quickly correct errors without starting over, whether you’re a beginner or a pro.
In this article, you’ll learn why CapCut Desktop is one of the best editors, the three easy steps to fix mistakes using it, and some common editing errors you can fix in just minutes.
Why CapCut Desktop Video Editor Is the Best Choice
When it comes to video editing, not all tools are created equal. Some are too complicated. Others are too basic. CapCut Desktop strikes the perfect balance between powerful features and easy-to-use controls. Here’s why it’s the editor you’ll want on your side:
- Simple Layout: Everything is clearly labeled, so you don’t have to dig through menus to find what you need.
- Undo and Redo Buttons: CapCut lets you undo or redo any action instantly if you make a mistake.
- Auto Save: Even if your computer crashes, CapCut saves your progress, so you don’t lose your work.
- Precision Editing: Tools like frame-by-frame trimming, timeline snapping, and keyframe animations help you make precise corrections.
- AI-Powered Features: CapCut has smart tools like auto-captioning, Voice Changer, background removal, and noise reduction to fix issues effortlessly.
- Free and Accessible: You get a professional-quality editor without paying for expensive software licenses.
Whether you need to fix a simple cut or add a missing transition, CapCut Desktop makes it easy, fast, and fun.
3 Simple Steps to Fix Editing Mistakes with CapCut Desktop Video Editor
Step 1: Identify the Mistake Using the Preview Window
First, play your video inside CapCut’s preview window. Observe for anything that looks off, such as jump cuts, out-of-sync audio, missing text, or awkward transitions. Zoom in on the timeline to spot tiny errors more easily! If you find something wrong, pause when you want to fix it. This helps you edit more precisely. You can create amazing, error-free videos using CapCut AI Video Generator.
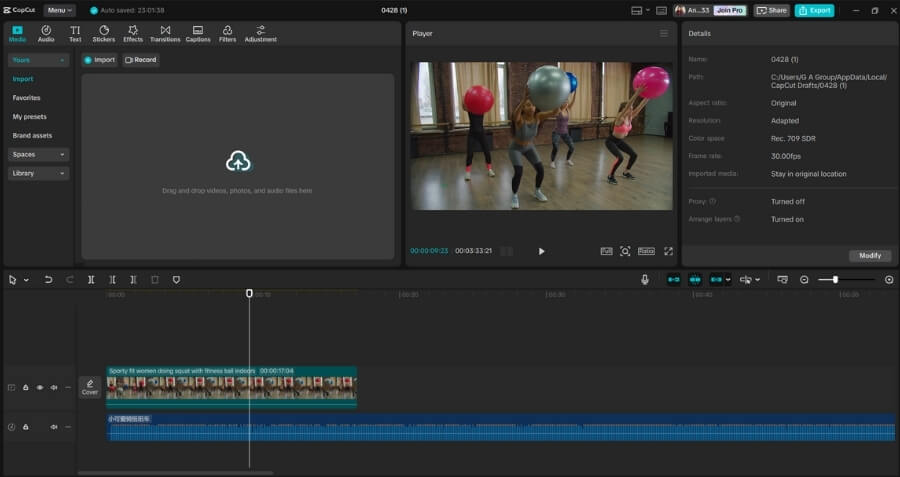
Step 2: Select and Adjust the Clip on the Timeline
Next, click on the clip or section that needs fixing. CapCut lets you easily drag, trim, split, or extend clips. You can also right-click to open quick options like “Delete,” “Copy,” “Mute,” or “Speed.”
Some quick fixes:
- Wrong timing: Drag the edge of the clip to shorten or extend it.
- Audio mismatch: Right-click the clip, detach the audio, and sync it manually.
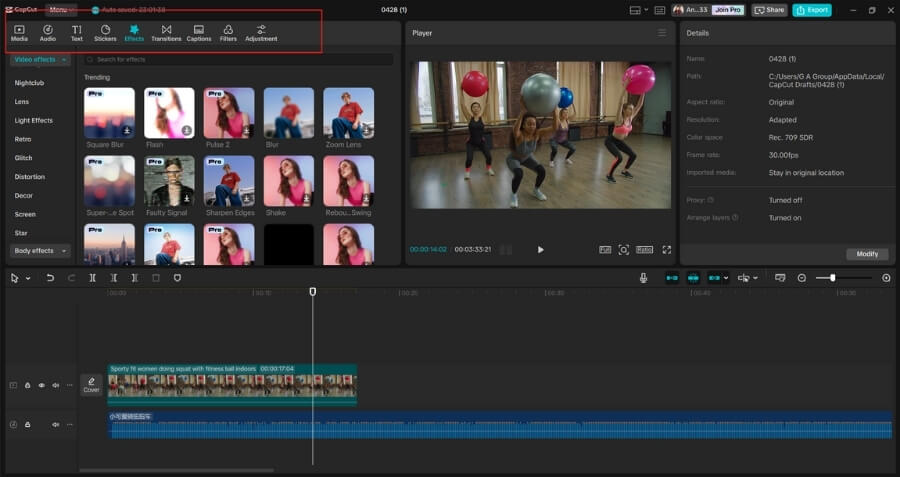
- Shaky transition: Insert a smoother transition effect from CapCut’s massive library.
Always remember, minor tweaks make a big difference!
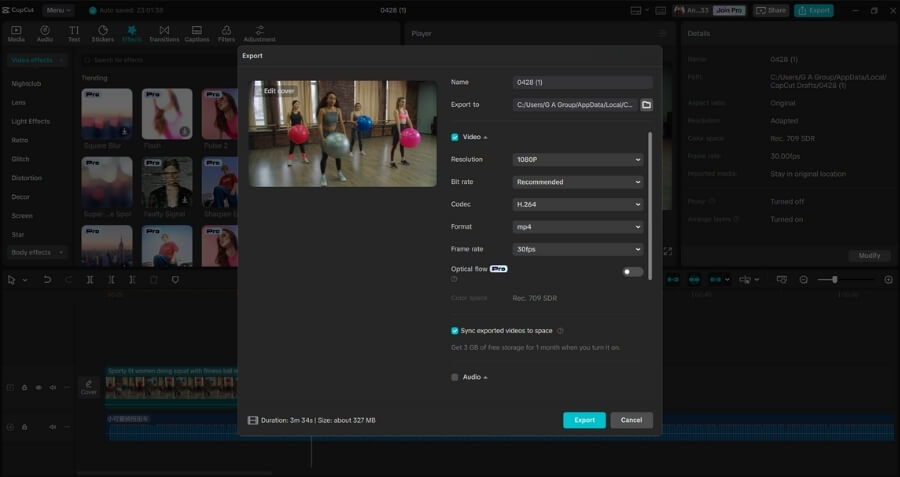
Step 3: Preview Again and Save Your Changes
Once you edit, watch your video again from a few seconds before the mistake. If it looks good, hit Export to save your polished video. CapCut lets you export in different resolutions like 720p, 1080p, or even 4K — perfect whether you post on TikTok, YouTube, or Instagram. Before final export, use CapCut’s “Auto Enhance” and “Stabilizer” to boost your video quality even more!
Common Editing Mistakes and How to Fix Them
Even professionals encounter editing mistakes. Here are the most common ones — and how CapCut can help you fix them:
Awkward Cuts
- Problem: Jump cuts disrupt the visual flow and can confuse viewers.
- Fix with CapCut: Use the Crossfade transition for smooth clip changes. Insert a B-roll or cutaway clip to maintain pacing without abrupt jumps.
Audio Mismatches
- Problem: Dialogue doesn’t sync with mouth movements, or the background music is too loud.
- Fix with CapCut: Detach and manually sync the audio track. Adjust volume curves and use keyframes for gradual audio changes.
Color Inconsistencies
- Problem: Different clips have varying color tones.
- Fix with CapCut: Apply the same filter to multiple clips. Use manual color adjustments to match brightness, contrast, and saturation.
Shaky Footage
- Problem: Handheld shots cause unprofessional-looking videos.
- Fix with CapCut: Apply the Stabilize effect. Crop slightly if stabilization results in frame distortion.
Timing Errors
- Problem: Effects or captions appear too early or too late.
- Fix with CapCut: Drag the layer in the timeline to perfectly align it with the visual or sound cue. Preview multiple times at different speeds to catch subtle timing issues.
Conclusion
Fixing editing mistakes doesn’t have to feel overwhelming, not when you have CapCut Desktop. Whether you’re a beginner or a professional, CapCut empowers you to create polished, error-free videos without reworking for hours. By following the simple 3-step method, identify, correct, and fine-tune, you’ll turn mistakes into moments of creativity. With CapCut’s advanced AI tools, even significant editing errors can be corrected swiftly and elegantly. Ready to fix your editing mistakes the easy way? Download CapCut Desktop Video Editor today and experience the future of stress-free video editing.